Installing Doors
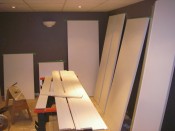 I’ve been busy getting all the doors painted, hung, and finished. There are two almost regular size doors: one for the bathroom, and one for the laundry room. There is also a bi-fold closet door in both the bathroom (leading to electrical panel, central vac and under-stairs storage) and another in the laundry room going into the furnace and hot water tank area. There’s also a couple smaller doors that I had to cut down.
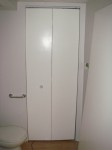 The bi-fold doors were pretty straight-forward. One was actually one left over from the previous owners, in the crawl space, which just happened to be the right size. I cleaned and painted it, and replaced all the track hardware in it.
The bi-fold in the laundry room was a bit too big – I had a 34″ opening, but all you can get are 32″ or 36″ doors (off the shelf at box stores, at least). I bought a 36″, and cut an inch off each side. There was enough wood in the edge that I didn’t have to do anything extra to it.
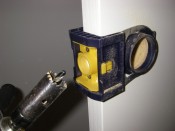
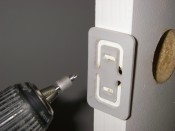
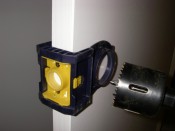 Having installed several door knobs before, I decided to buy a kit for it. It’s basically a plastic template that guides a hole saw to drill the right places. This thing was $20, and included the template, two hole saws, a hinge template, and a router template for the strike plate. The hole saws that come with it definitely aren’t the best quality – one had a couple teeth noticeably longer than the rest – but they do work, and you could always use your own, if you have the right size.
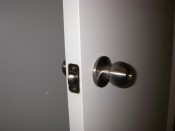 It made quick work of the door. The router bit definitely made the strike plate easy – you just follow the template, and then chisel out what is missing.
The hinge template was utterly useless for me. It was 4″ high, but 1″ deep – a standard 3.5″ hinge is 1″ deep, but a 4″ hinge is 1.25″ deep. This means using a 4″ hinge would have more of the hinge sticking out the back, and a wider swing to the door (meaning you need greater space between the door and the jamb, to make sure it doesn’t stick). I didn’t even try to use it at all, and just chiseled out the hinges by hand, after tracing them with a pencil.
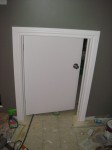 I have a short door for access to the crawl space. This was just a standard hollow door that I cut down. I set up my table saw for 1 1⁄8″, and cut a few strips of pine board to fill in the gap left at the cut. It’s possible to use the piece you cut off, but I found it was glued so well to the hardboard of the door, that it wasn’t worth the effort. Since it’s also on the bottom of the doors, it’s not visible at all so the fact that it looks slightly different doesn’t really matter. I used some glue and a couple brad nails to hold the piece in place.
There’s also another little door which I’ll cover in tomorrow’s post.
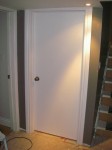 I also had to cut down both the laundry room and bathroom doors, as they are ~74″ (instead of standard 80″) because they’re under the vent and beams for the house. I used the same technique as before and just used the 1 1⁄8″ pine board to fill in the bottom from where I cut.
I should also mention, I was originally going to use panel doors (the ones with the bevels you see everywhere), but quickly discovered that because of my sizing, it really made cutting the doors much more difficult, since you have to worry about keeping the pieces of panels centered. For my short doors, they didn’t work out at all, and basically there was no way to cut them without cutting at the bevel marker. Since my upstairs interior doors are also all the plain flat ones, it wasn’t that big a decision to keep the downstairs ones the same, and simplify cutting at the same time. If you have non-standard door sizes, really be aware of that before hand, especially if you are building new doors like I was (not that I had that much choice in door sizes, without radically changing the overall layout). You may end up being forced to order custom doors or change styles.
